Creating your LOT
The first thing you need to do is to create details concerning the LOT of eggs you wish to monitor. This is very important as the app uses these details from the start to the finish of the incubation period.
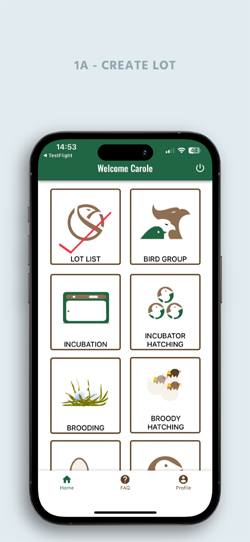
Click on the “LOT LIST” icon.
On the bottom navigation bar click on the + symbol of « New LOT ».
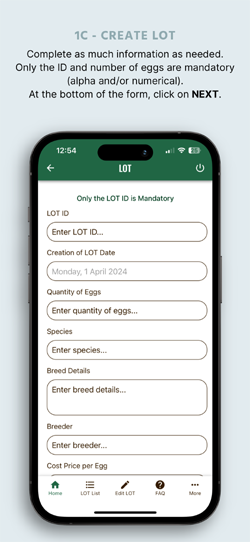
A form will display with different fields to fill in.
The only field which is mandatory is the “LOT ID”. This can be alpha-numerical.
You can search for a specific LOT in the « LOT LIST» section with the relevant ID you have entered. The ID reference number will collect the eggs’ information throughout the incubation. For a quick reference, when filling in your “NEW LOT” details, you can fill in as much information you deem necessary. The first screen in this section collects the information of the LOT and, after pressing on the NEXT button, the second screen will record where you would like to allocate the eggs. The number available is shown in the « USEABLE EGGS » field. You then have the possibility of three fields ; either in the incubator (including which incubator and which level if this is your case), the number of eggs you wish to set under a broody hen and the number of hatching eggs you’d like to sell.

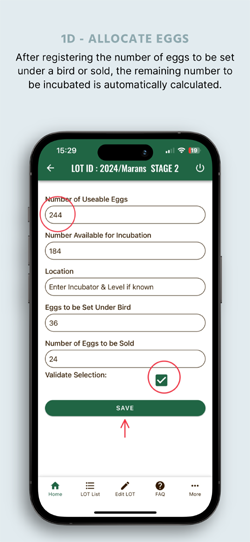
Ticking the validate box at the end of the form will allow the app to apply these entries at a further date for the different uses of this LOT of eggs.
Once saved, the next screen to appear will be the list of LOTS of eggs you have created.
The LOT information can be updated and completed at any time in the «LOT LIST» section, by clicking on the pen symbol in the relative LOT.
The LOT can be deleted by clicking on the Dustbin symbol.
If, for example, you decide to incubate more eggs and remove them from sale, to have the correct information at a later stage, the quantities must be modified manually in this list.
By clicking on the double chevron, all the details you have filled in will appear.
On this screen, three short cut buttons are available. It is advisable to use these short cuts once you are familiar with working from the Home Screen buttons.
EGGS TO BE INCUBATED
By selecting a LOT ID and a pre-registered INCUBATION PLAN, all the details will be shown on the screen. The only field to be filled in, after selecting your LOT and PLAN, is the number of eggs you wish to set. The quantity of eggs NOT set will need to be registered at a later date with a new LOT ID and a new INCUBATION PLAN.
EGGS TO BE SET UNDER BIRD
Monitoring eggs under a broody hen.
EGGS FOR SALE
Monitoring eggs to be sold.
All of the three above can be created by clicking on the appropriate button.
A bottom navigation bar is available to go to a specific relative section.


